PowerPoint 2013 allows you to convert your presentation into a video file. Converting a presentation into a video is useful because the MPEG-4 and WMV video file formats can be played on most computers. All transitions, animations, sounds, and narration in the presentation are embedded into the video. The video is not editable, so the entire presentation will always remain as the author intended. This is especially useful if your audience does not have PowerPoint 2013 installed on their computers.
- Once you have finished your presentation and you are ready to convert it to a video, click on the FILE tab and then Export.
- From the Export menu, click on Create a Video.

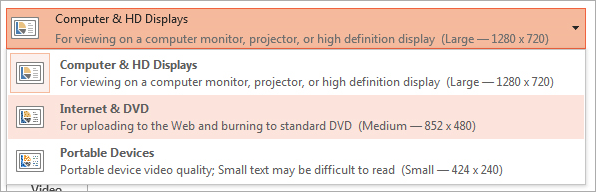
- The first drop-down box allows you to select the quality of the video to be created. Each quality option is described in the menu, including the dimensions of the resulting video. For example, Computer & HD Displays is the highest quality video you can create for use with a projector, a computer screen, or high-definition display. If you are creating a video for the Internet, the second option, Internet & DVD, is the best. Finally, if you are planning to play the video on a portable device, you should select the last option, Portable Devices.
- The second drop-down box refers to the possibility of using recorded timings and narrations you may have added to your animations and transitions on different slides in your presentation. Selecting Use Recorded Timings and Narrations will insure these remain intact in the video you create.

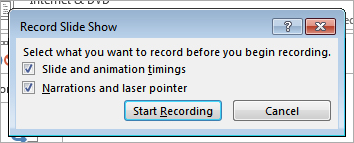
- If you wish to record your own timings and narrations but have not done so already, you can do it here. Click on Record Timings and Narrations. A dialog box, which allows you to record Slide and animation timings and Narration and laser timings, will appear. After you press Start Recording, you will be prompted to record your timings and narrations.
- By clicking on Preview Timings and Narrations, you may preview your existing timings and narrations prior to creating your video. If you are unhappy with the results, you may re-record them at this step.
- Finally, the option Seconds to spend on each slide refers to the amount of time the video spends on each slide. The default setting is 5:00 seconds. You may increase or reduce this time to suit your preferences.
- To accept these settings and create the video, press the Create Video button. Doing so will open a dialog box. Here you can select whether you want to save the video in MPEG-4 or WMV format. Make your selection, and click Save.

Depending on how big your presentation is, saving may take a few minutes. Once your video is saved, you may play it on your computer.