Funnel charts are a great way to visualize how sequential data can be broken up into different stages. Unfortunately, the “Funnel” SmartArt graphic included with PowerPoint (Insert → SmartArt → Hierarchy) doesn’t reflect the hierarchical nature of the stages and supports only three inputs. That’s why I decided to write this post to demonstrate how easy it is to make a funnel diagram from basic PowerPoint shapes; just follow the steps below.
Add rectangle shapes (Insert → Shapes → Rectangle) that represent the stages of the funnel, like depicted below.
Add a trapezoid shape (Insert → Shapes → Trapezoid); then rotate the shape by 180 degrees (hold Shift key while rotating), and resize it to match the height of the stage shapes.
Delete the first/third/fifth/etc. stage shapes.
Select the first remaining stage shape and the trapezoid (in this order), then click on Format → Merge Shapes → Fragment.
Unlike shapes, pictures in PowerPoint don't have a transparency setting. As a workaround you can fill a shape with a picture and then adjust the fill transparency. Here's the step-by-step guide for PowerPoint 2010 and later:
Add a rectangle shape to the slide.
Right-click the rectangle and select Format Shape from the context menu.
Select Fill → Picture or texture fill and click on Insert picture from → File... to choose an image file.
Use the transparency slider to make the picture as transparent as you want.
Setting up a PowerPoint slideshow to loop continuously is easy:
Switch to the Slide Show Ribbon tab.
Click on Set Up Slide Show.
Tick the Loop continuously until 'Esc' checkbox.
By default, PowerPoint advances to the next slide only when a mouse click occurs. If you want your slideshow to advance automatically, follow the steps below:
Select all slides in the navigation pane.
Switch to the Transitions tab in the Ribbon.
In the Timing group under Advance Slide tick the checkbox next to After:
Enter the duration you want each slide to display.
In this tutorial, you will learn how to remove part of an image by applying a very basic ripped paper effect. This is especially useful for cropping screenshots, as shown in the example below.
Here are the exact steps that I went through to achieve this effect in PowerPoint 2013/2016:
Add an image to the slide.
Use the Freeform drawing tool to create a zigzag shape that covers the bottom part of the image.
Select the image first, then select the zigzag shape while holding the Shift key.
Choose DRAWING TOOLS → FORMAT → Merge Shapes → Subtract.
Add a drop-down shadow via FORMAT → Picture Styles → Picture Effects → Shadow.
In this post, I will demonstrate how to create a diagram consisting of four curved arrows, as shown in the image below:
The tutorial relies heavily on the Merge Shapes features of PowerPoint 2013/2016. In order to use these features in PowerPoint 2010, you first have to customize the Ribbon toolbar, as described here.
Here are the exact steps to follow to create the cyclic arrow diagram:
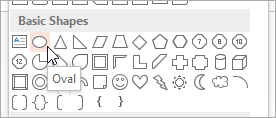
Add an Oval shape to the slide (hold the Shift key while drawing to make it a circle).
Select the circle and press Ctrl+D to duplicate it.
Move the new circle on top of the existing one.
Reduce the size of the circle by grabbing the handle with the mouse and dragging it (hold Ctrl+Shift while resizing).
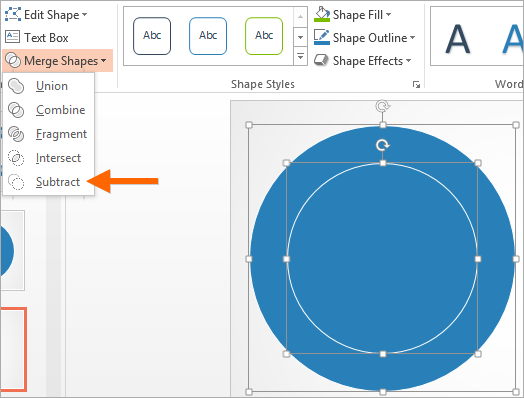
Select the large circle.
Hold the Shift key and click on the small circle to add it to the selection.
Choose FORMAT → Merge Shapes → Subtract to cut out the small circle from the large one.
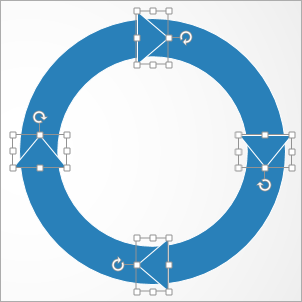
Add a Triangle shape and duplicate it three times (Ctrl+D).
Move and rotate the triangles so they form the heads of the four arrows (hold Shift while rotating to snap to steps of 15 degrees).
Select the circle and the triangles.
Choose FORMAT → Merge Shapes → Fragment to break up the shapes into smaller parts.
Select and delete the fragments that are not needed for the diagram.
Select a part of the circle.
Hold Shift and select the matching arrowhead to add it to the selection.
Choose FORMAT → Merge Shapes → Union to turn the selected shapes into one single shape.
Repeat the above steps for all four arrows.
Select the four arrows and change their fill to a gradient (FORMAT → Shape File → Gradient).
Increase the outline width of the shapes to 3 pt (FORMAT → Shape Outline → Weight).
If necessary, change the outline color to white (FORMAT → Shape Outline).
Add a Text Box to the slide and fill it with some text for the first arrow.
Increase the font size for the text box to 32 pt.
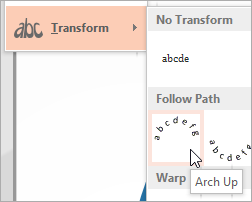
Choose FORMAT → WordArt Styles → Text Effects → Transform → Follow Path → Arch Up.
Increase the size of the text box to almost match the size of the circle and center it within the circle.
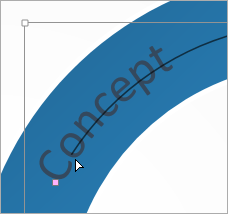
Grab the pink handle left of the text and position the text within the first arrow.
Change the text to bold and change its font color to white.
Duplicate the arrow text shape and use the pink handle to move the text to the second arrow.
Duplicate the text shape again and change its text effect to Arch Down (FORMAT → WordArt Styles → Text Effects → Transform → Follow Path → Arch Down).
Change the alignment of the text to Align Right (Ctrl+R).
Move the text to the third arrow and increase the size of the text box a bit (hold Ctrl+Shift+Alt while resizing).
In this post, you will learn how to create a text crawl similar to the one used at the beginning of the Star Wars films. Here's a video of the final PowerPoint presentation:
To achieve the text crawl effect, I basically had to do three things:
Add a 3D perspective effect to the text.
Add a motion path animation to move the text up.
Combine the motion path animation with a shrink animation to simulate the depth effect.
You can find step-by-step instructions on how to create the same effect below:
Add a Text Box to the slide via INSERT → Text Box.
Type in =rand(3,4) and press Enter to generate three paragraphs of example text.
Change the font of the text to Arial Black and the size to 44 point.
Set the alignment of the text to Justify.
Select the text box and choose FORMAT → WordArt Styles → Text Effects → 3-D Rotation → Perspective Relaxed Moderately.
Choose FORMAT → WordArt Styles → Text Effects → 3-D Rotation → 3-D Rotation Options and increase the Perspective value to 80.
Center the text box on the slide and increase its size so the width of the first line almost matches the slide width.
Move the text box below the slide so that the first line is directly below the slide edge.
Select the text box and choose ANIMATIONS → Add Animation → More Motion Paths… → Up.
Grab the red arrow (which marks the end of the motion) with the mouse cursor and drag it to the top of the slide. Hold down the Shift key while dragging to keep the motion path vertical).
Add a second animation via ANIMATIONS → Add Animation → Grow/Shrink.
Click the Animation Pane Ribbon button.
Double-click the Up animation item in the Animation Pane. In the Effect tab, change the values of Smooth start and Smooth end to 0.
Double-click the Grow/Shrink item in the Animation Pane, change the Size value to 10%, and change Timing → Start to With Previous.
Grab the end of the Up animation timeline bar and drag it to the right until a value of 30.0s is reached.
Repeat the previous step for the Grow/Shrink animation.
Change the slide background to a starry sky by right-clicking on the slide and choosing Format Background… → Picture or texture fill → File…. Then select an appropriate graphic (click here to download a ready-to-use image file).
Select the crawl text. Change the color to a yellow orange: HOME → Font Color.
Choose FORMAT → WordArt Style → Text Effects → Glow → More Glow Colors to give the text a yellow glow effect.
Create a Rectangle shape that covers the top half of the slide.
Remove the outline of the shape via FORMAT → Shape Styles → Shape Outline → No Outline.
Set the shape fill to the same image that was used for the slide background.


