It is always a good idea to reduce the size of your PowerPoint presentation, particularly if your presentation contains large photos or images. Picture compression can quickly reduce the file size of one or all of your photos at the same time. File reduction is especially useful when you want to upload your presentation to a website or when you need to email your presentation to your audience.
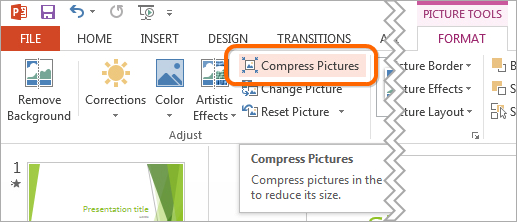
- Select an image on the slide to activate the FORMAT tab.
- Switch to the FORMAT tab and click on Compress Pictures.
- A dialog box will appear with two sets of options.
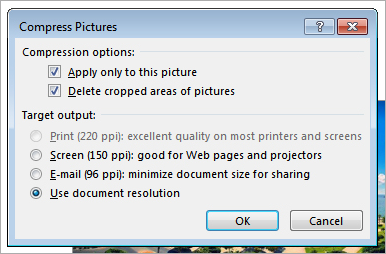
Under Compression Options, you can select whether to compress all photos in your presentation or only the photo currently selected. Additionally, if you have any cropped pictures, the cropped sections are hidden from view but are not deleted. Check the second box to delete the cropped parts and to minimize the size of your presentation.
The options under Target Output determine the degree of compression applied to the images. The first three options are fairly self-explanatory. The Use document resolution option adjusts the picture resolution to 220 dpi.
- Select the option that best fits your preferences and click OK to start the compression process.
If you compressed your presentation and the file is still too large, repeat the steps above and tweak different options.