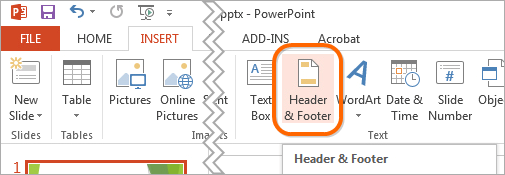
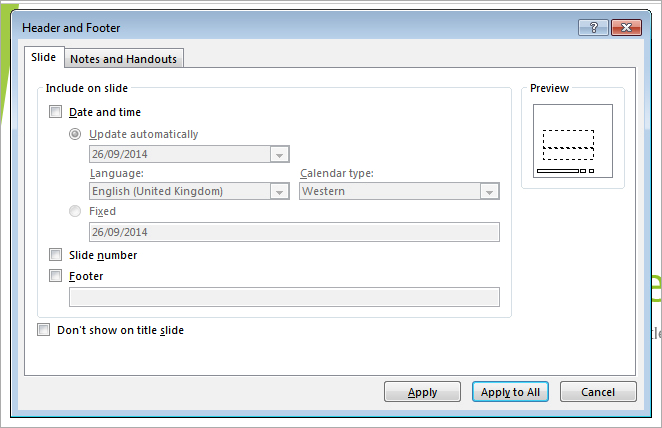
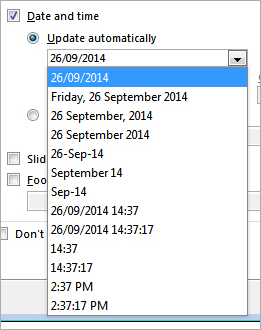
PowerPoint allows you to create headers and footers, that is, information that appears at the top and bottom of all slides. This information will typically include the name of the presenters, their affiliation, and the presentation title, slide number, and date, but other information can be added as well. However, be careful not to spoil your presentation with too much information.

Keyboard shortcuts are a great way to improve your productivity with PowerPoint. Why? Because usually, you already have your hands on the keyboard. There is no need to disrupt your workflow by reaching for the mouse and moving the mouse cursor across the screen.
In this post, I will introduce you to twenty very useful keyboard shortcuts for PowerPoint 2013/2016. Please note that I don’t include common Windows shortcuts such as Ctrl+C (copy) and Ctrl+V (paste) in the list.
Here’s a great slideshow with insights from professional presenters on how to prepare, deliver, and close a presentation:
PowerPoint presentations are hybrid sales tools. These slideshows evolved from two well-established sales regimens: face-to-face selling, and sales presentations in the form of letters, flyers, brochures, and web pages.
With face-to-face selling, it’s easy for the salesperson to solicit questions and comments from the prospect. A prospect who doesn’t want to buy your product or service might raise a legitimate objection that is making her reluctant to say “yes.” Alternatively, she might fabricate an objection so that she doesn’t have to deal with the real problem. In either case, the salesperson has an opportunity to listen to the objection, and deal with it.
Crafting a sales brochure or a website product page, on the other hand, leaves very little opportunity for the salesperson to hear a prospect voice an objection. A prospect might phone you with a question. But the most effective printed or online sales presentations are the ones that anticipate all possible objections, and answer them as part of the write-up.
PowerPoint presentations have elements of both of these traditional sales methodologies. Because PowerPoint slideshows are usually delivered to a live audience, there are opportunities to interact with prospects and entertain their objections. Often, however, there isn’t an effective way for the presenter and the audience to have a conversation. When crafting a slideshow, it’s wise to anticipate the problems that people are considering, and weave the solutions into the PowerPoint slides.

Here are the most common objections that salespeople have to deal with in face-to-face selling. It’s important to understand each objection, to analyze how the objection applies to the products and services that you’re selling to each of your target audiences, and to include answers to these objections in your slide show, and in the narrative that accompanies your PowerPoint presentation.
Even though it may be true, most buyers won’t tell you that they don’t have the money to buy your wares. This is especially true if you’re delivering your PowerPoint sales presentation to a diverse audience, such as the people who attend your presentation at a seminar or trade show. By contrast, if you’re standing in front of a smaller group of professionals from the same company, you may hear that the manager who needs to make the buying decision doesn’t have enough funds in her budget.
No matter how it is expressed, the underlying problem is that your price is too high. When a prospect compares the benefits that you’ve explained with the price that you’re asking, she may decide that she’s not going to sign the purchase order.
Your PowerPoint presentation has to justify the price of your product or service. Mention the high-quality components that your company uses to build your product. Compare your price with that of competitors who charge even more for a comparable product. Dollarize the price and express it in a cost-per-day or cost-per-week. Compare the price of your solution to the price that your prospects will pay if they continue with the status quo. Weave risk reduction and good will and customer support and other benefits into the discussion about price.
Don’t dwell on the costs that your company incurred to bring your product to the marketplace. Your prospects aren’t interested in the years of research and development that you performed. They don’t care that you had to retool your manufacturing plant to make the new products. They only care about the ratio of the price you’re charging to the benefits that you provide.
Some prospects believe that they have to discuss their buying decisions with anybody who will listen. Remind your prospects that they do indeed have the authority to make a buying decision. Tell them that they buy much more expensive products and services every year, with no need to get special approval.
Deal with this objection by equating urgency with price reductions. Tell prospects that you’re offering a discount if they make the buying decision immediately. Explain why the items that you’re selling are superior to those that your competitors offer. Talk about the special support level that you’re offering to people who buy today. Mention the discount coupons that you’re bundling with today’s purchase, enabling prospects to save even more money when they buy future products from your company.
The general objections discussed above are annoying and need to be dealt with. The specific problems, however, are huge opportunities for you to close the sale and walk away with a contract. You should do everything in your power to encourage prospects to voice these concerns.
It’s possible that somebody has a misunderstanding about your products and services. If they’re reluctant to buy because they have a misconception about what you’re selling, then this is an opportunity for you to explain the problem away. From a long-term perspective, you have a chance to change your PowerPoint presentation to include accurate information about this mistaken perception.
Your best policy is to encourage questions. Silence is your enemy. For every person who will voice an objection to buying the product or service that you offer, many more will sit silently and simply not buy. Or they’ll report back to their managers that your offering is flawed in some significant way. The only way to solve this problem is to encourage the people listening to your PowerPoint presentation to voice their concerns so that you can answer them in front of the whole group.
There’s always the danger that you’ll flub your answer to a question that you didn’t anticipate. From a long-term perspective, it really doesn’t matter. Do your best to answer the question today. You’ll be able to think about it tomorrow, and develop a powerful answer for your next presentation. And as Sergio Zyman said in his book The End of Marketing As We Know It, “You don’t have to win every round to win the fight.”
When crafting a PowerPoint sales presentation, anticipate your prospects’ objections and deal with them in your slides and in your narrative. Welcome questions. Deal with them as best you can, and learn from them. After every presentation, think through how you can tweak your slides and narrative so that you’ll increase your sales effectiveness the next time you deliver a slideshow to a group of prospects.
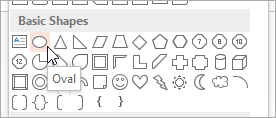
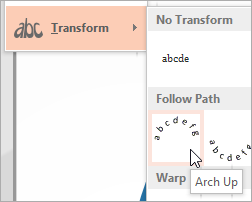
In this post, I will demonstrate how to create a diagram consisting of four curved arrows, as shown in the image below:
![]()
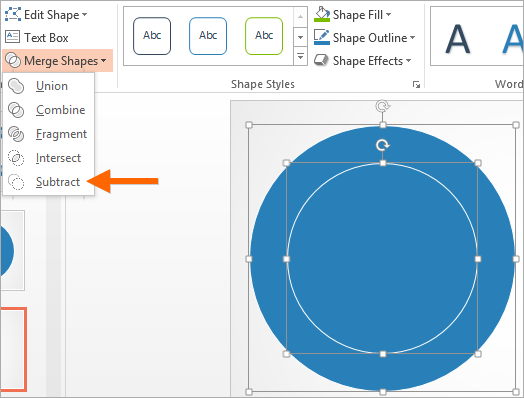
The tutorial relies heavily on the Merge Shapes features of PowerPoint 2013/2016. In order to use these features in PowerPoint 2010, you first have to customize the Ribbon toolbar, as described here.
Here are the exact steps to follow to create the cyclic arrow diagram:


Click here to download the final PowerPoint .pptx file.
PowerPoint presentations are much like college essays. They present cited, relevant information that is meant to educate and inform. They are made for a wide audience. Do you remember what your teachers used to advise you to do when they assigned an essay writing assignment?
“Don’t forget to make an outline before you write.”
You can use the same concept in your next presentation. Just because it contains pictures and encourages interactivity doesn’t mean that it can’t be approached in a similar fashion. Outlining key points is a powerful strategy, and PowerPoint 2013 has a very useful tool to help you do it. This article will explain the importance of outlining and how to use the PowerPoint Outline View.
The answer is fairly simple: outlining focuses your presentation. It acts as a sort of pre-first draft, giving you leeway to throw ideas on the table and figure out which ones work best for your presentation. By putting everything you’ve thought of in one space, you can see your ideas and points side-by-side and more efficiently eliminate ones that don’t contribute to your overall message. By tightening the screws and oiling the gears, you will have a more cohesive presentation that works well both in presenting (on your end) and receiving (on the audience’s end).
When you switch to Outline View in PowerPoint, you will see all the text currently within your title and text placeholders in a document-style format that appears on the left side of the screen. This will allow you to go through all the text and edit it without having to locate your text boxes one by one, slide by slide. It is a very useful tool to use when you want to focus on both text and image in a single go, consolidating your work from different areas of the screen.

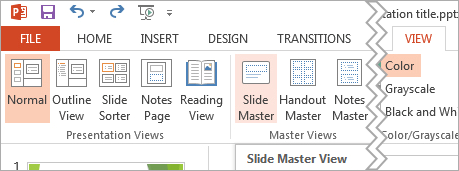
Outline View can easily be switched on and off by using the Ctrl+Shift+Tab key combination or via VIEW → Outline View.

Text typed in Outline View will appear in the title of the current slide. Press Enter to add a new slide. By pressing Tab the current item will be indented and become a subitem of the previous item. Shift+Tab removes the indentation. All of these features are also accessible via the context menu, which can be accessed by right-clicking an outline item.
If you have already created an outline in Microsoft Word, you can easily convert it into PowerPoint slides. PowerPoint will use the heading styles that you assigned to your text in Word to determine which paragraphs are titles and which are content. Heading 1 lines will become slide titles, Heading 2 lines will become bulleted items on the slides, and Heading 3 lines will become sub-bulleted items.
To import an existing outline file, click the drop-down menu under New Slide on the HOME tab, and select Slides from Outline. Navigate to the outline file, and click Insert.

Another option is to create an outline in .txt format using Notepad (or any other text editor), as shown in the screenshot below.

Normal paragraphs will be converted into slide titles, whereas paragraphs indented by tabs will result in bulleted lists.
All of the best presentations include three things: research, quality, and purpose. PowerPoint’s Outline View can help you achieve the quality work you desire as you create your presentation and impress your audience with your vision. By consolidating all of your important content into a single segregated window, you can more easily weed out the text you don’t want and refine the text you do want. That way, by the end, you’ll achieve your goal.
ShapeChef is a tool that helps you find and manage graphics and charts for your presentations. Click here for details.